Hey, don't mind my books up in the corner okay?
As Salamu Alikum and hello menasan!
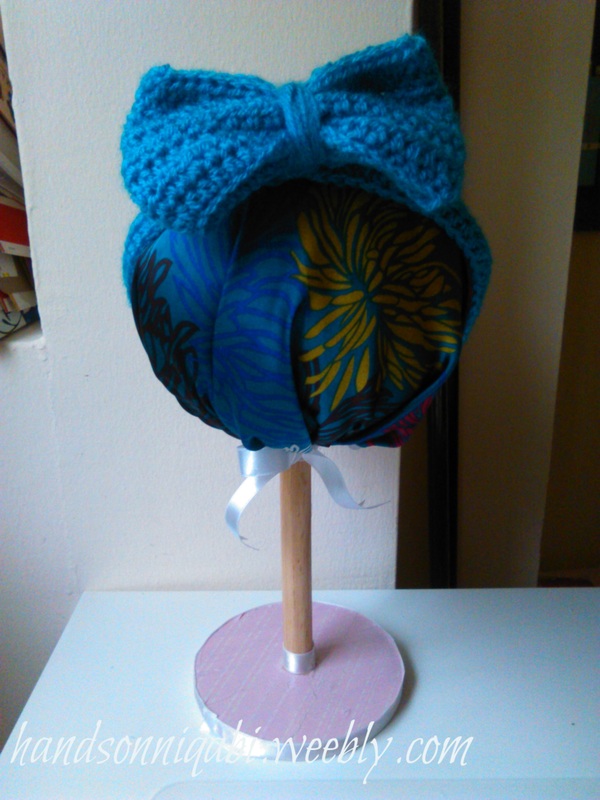
Ohh whee!!! My very first tutorial! I never did one before! This tutorial is going to be for a hat stand. You can use it for whatever, for your own personal use, photos, craft show etc. I am making this for taking pictures with. I have looked all around the internet and found some really nice hat stands. There just weren’t that many that actually showed you how to make your own without having to go buy all these wood pieces, and cut and screw them in place. Not that I can’t do that. I wanted to find something that I could make that was real easy.
And you guys see my hands!!! LOL that was really random!
WARNING: I literally was making this up as I went. I got the idea to cover the Styrofoam ball with cotton and fabric from a YouTube video but other than that, I was making it up as I went. And because I was procrastinating I just finished it today. Seriously. So, onto the pictorial! (I love how that sounds.)
The materials I used:
Warning: You might burn your fingers with the glue, just saying.
The materials I used:
- Wooden toilet tissue holder- 7 AED from Daiso
- Styrofoam ball- 6 AED from stationary shop, the I used is 15 cm around
- Ribbon- 2.50 AED from stationary shop
- Hot glue gun
- Glue for glue gun- 13 AED, I used up the two I got that was 50 fils each, and bought a pack of 12 for 12 AED. I could have gotten 24 sticks for 12 dhs if I went to the Dubai Library Distributor!
- Washi tape- used one from a pack of 4, 7 AED from Daiso
- Fabric- I had some sitting packed away, just waiting to be used
- Exactor knife- for cutting a hole
- Pen- for marking where to cut
- Pins- for pinning the fabric
- Scissors
- Patience- for the amount of time it took to make it. You could probably make this in one sitting, but since I was trying to take pictures, and then ran out of glue, it took longer.
Warning: You might burn your fingers with the glue, just saying.
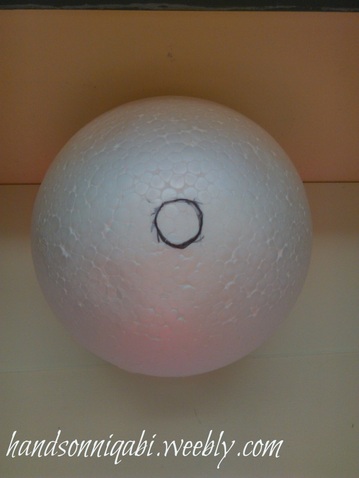
First, you set the ball on the wooden stand and trace with a pen where you are going eventually glue to the stand. Don't worry about the color, it will be cut out.
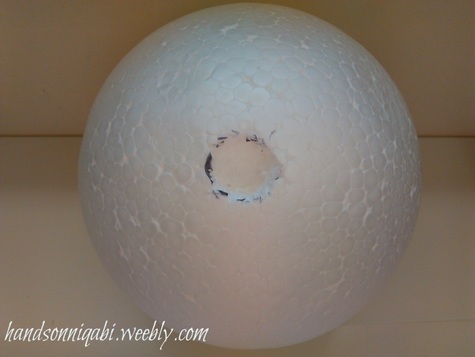
Then you start cutting the Styrofoam and keep putting in on the stand to make sure it fits, and cut down into the ball until you reach a point where you are satisfied that it wont fall off and is secure.
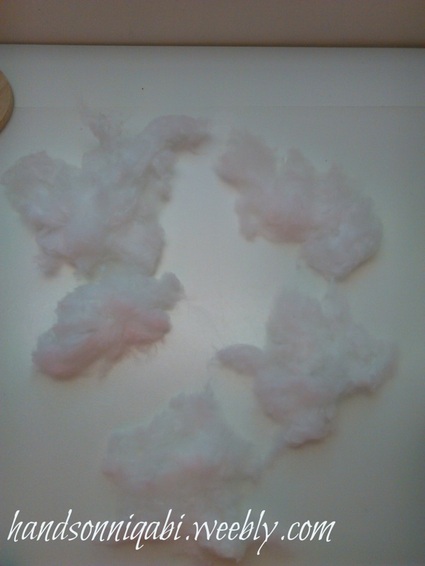
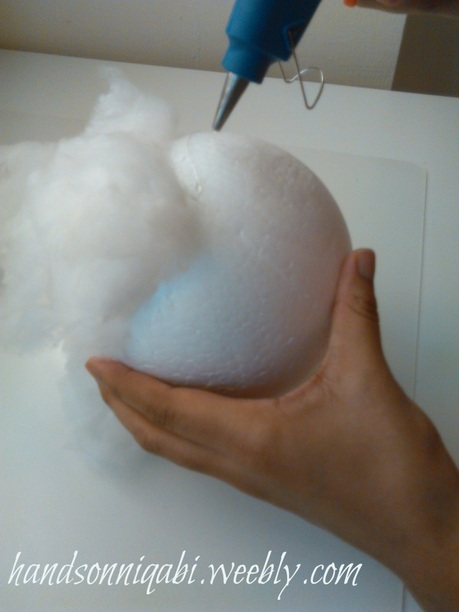
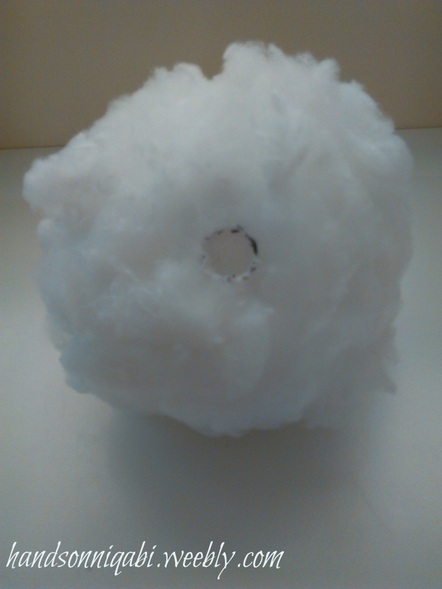
Next comes the gluing part. I think I used more fluff than in the picture by the way. Remember, you have to work quick because the glue dries quick so it's good to have the fluff already out and in front of you, instead of having to reach in to the bag or wherever you have the fluff. Just keep gluing and putting the fluff on the Styrofoam until it is completely covered, except the hole, please, don't cover the hole. You don't have to cover it thickly, I just did it so that it had a nice soft layer, and I couldn't see any Styrofoam. It should look like the picture below.
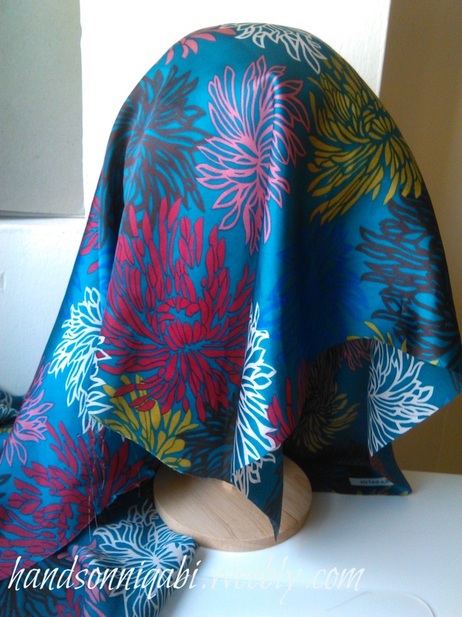
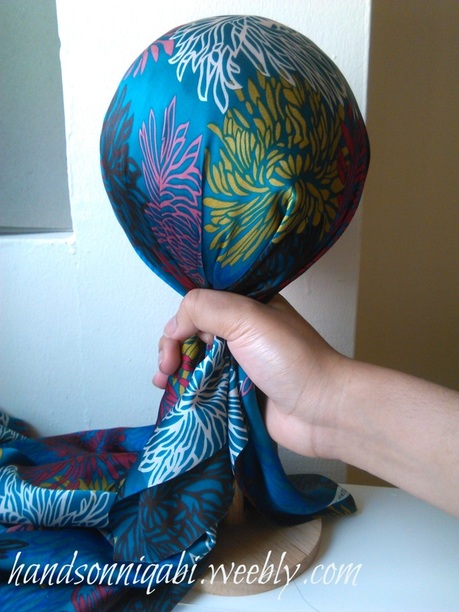
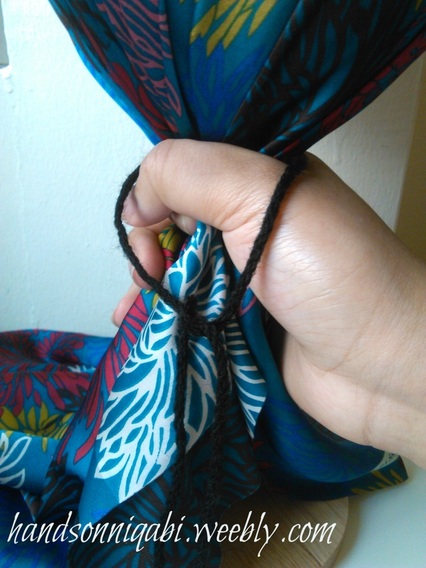
Now you put the ball on the stand and place the fabric over the ball. You need to have a piece of yarn or string that is about 15 inches (38 cm) long. This next part is a little tricky and it helps if you have someone to help. You need to grab the fabric right at the bottom of the ball like in the photo below and then wrap the yarn around to tie a knot.
If you have someone to help you, then you or the helper hold the fabric down, and then the other person needs to tie a very tight knot. If you don't have someone, like I didn't, then you it's ok if you make the first tie loose. Then, let go of the fabric and pull on yarn to secure it, while pulling down on the fabric to keep it tight on the ball. Make sure to tie it at least twice. You want a very secure knot to keep the fabric on the ball for the next step.
If you have someone to help you, then you or the helper hold the fabric down, and then the other person needs to tie a very tight knot. If you don't have someone, like I didn't, then you it's ok if you make the first tie loose. Then, let go of the fabric and pull on yarn to secure it, while pulling down on the fabric to keep it tight on the ball. Make sure to tie it at least twice. You want a very secure knot to keep the fabric on the ball for the next step.
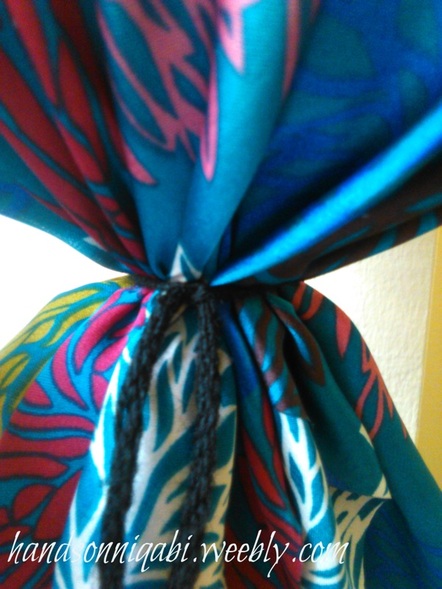
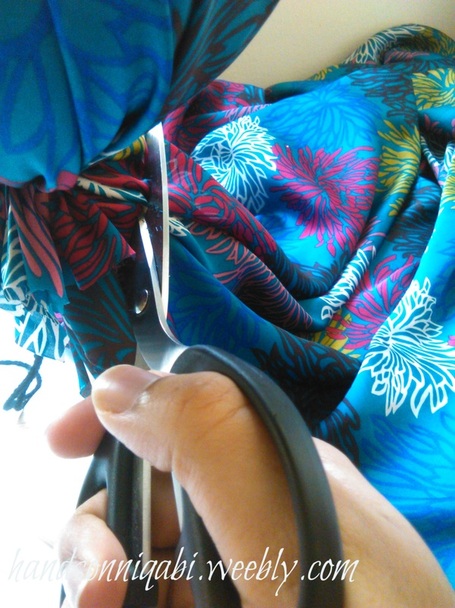
Next is cutting. You are going to cut away a lot of the fabric under the yarn, leaving just a little hanging, which is going to get cut off later.
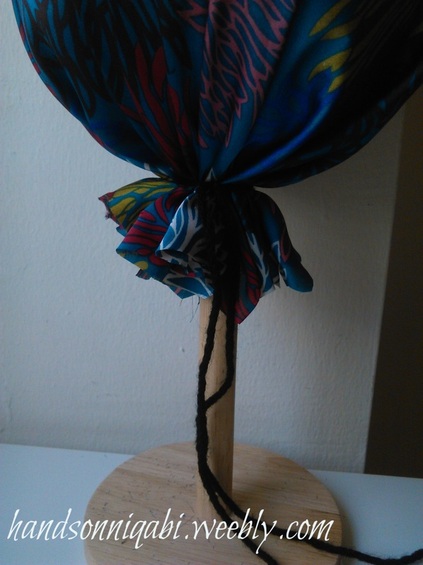
This post is a rather long one, so I decided to cut it into two parts. After cutting the fabric you might want to take a rest, eat something if you haven't already, walk around, I don't know, whatever you do to relax. Or, you could go on over to the next post and keep on going with this project!
P.S. Yall, I am so sorry it took 4 HOURS to get this post up. I had to take some more pictures, send them from my mom's phone to my email, then download them, watermark them, and give the photos names. But I am also the queen of procrastination subhanallah, so I could have done this the day before yesterday.
What do you think of my first tutorial? If you have any pointers, or notice any mistakes, or need any help, tell me down below, I'd love to know!
 RSS Feed
